
Tutorial: Using That New AEG Part 1
Hey guys, Tang from Fox Airsoft here. Today's topic will be AEG basics. So maybe you picked up one of our beginner packages, or the gun you picked up has the essential accessories such as a battery and charger and either it is lacking instructions or you just need a better explanation. That is what we are going to tackle today. I'll go over every essential accessory that you use with your new AEG as well as discuss the things you should and shouldn't do with your new investment. This blog is designed to help new players and experienced players alike and help you on your journey in airsoft.
I will be demonstrating on a few M4-style guns that for all intents and purposes will function the same but have some slightly differing features. We will use a Lancer Tactical Mk18 Gen 2, an ASG M-15 Armalite carbine Sportline edition, and the Elite Force M4 CFR. But first let's start with the boring stuff, which is batteries.
Batteries
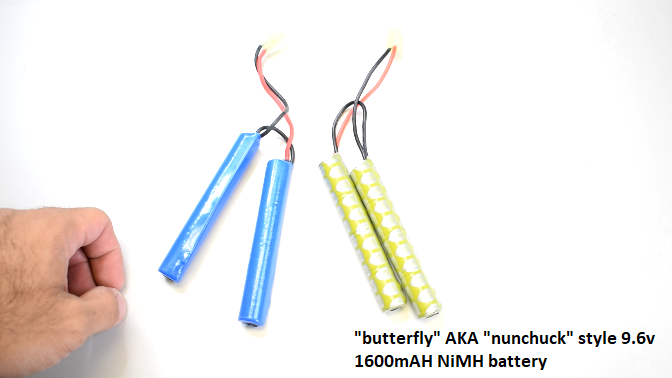
Click to purchase the Enhanced 9.6v NiMH Battery
I have two here which are pretty much the same. They're both nickel-metal hydride (NiMH). They both have small Tamiya-style plugs, which is the most common plug out there, and they both have roughly about 1600 milliamps (mAH) in capacity. So this configuration where it's two split bodies here, that would be called the nunchuck or butterfly style, and this is the most common used battery for M4s.
Charging - Standard Charger
For charging your battery, you may have a standard wall-charger or one of our recommended upgraded chargers such as the ASG Auto-Stop Charger or the ASG Multi-Balance Charger. We will go over briefly how they function and the pros and cons of each style.
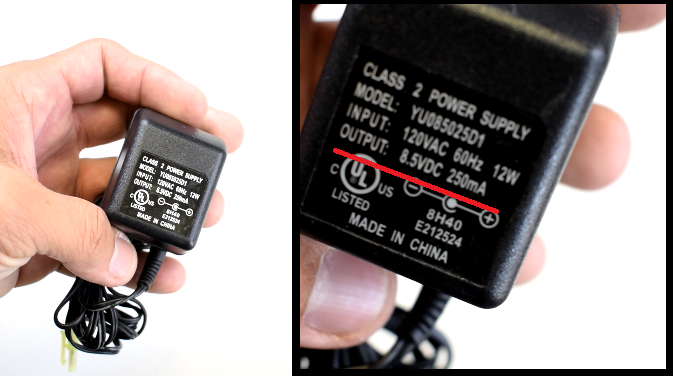
Using a standard wall charger, you are going to first look out for the output which should be marked on the charger. This one I grabbed here has an output of 250 milliamps per hour. Take note of the capacity of your NiMH battery. The ones we have here are again 1600mAH. Take the capacity of your battery and divide it by the output rating of your charger. 1600/250 is 6.4 which is the number of hours you will need to charge. With the standard wall charger, it does not cut off on its own, so you have to constantly monitor it to make sure you don't overcharge it; otherwise, you can risk damaging the battery or causing a fire. Make sure the battery is not hot to the touch while charging. Warm batteries are OK but just keep in mind of it getting hot as it could be a sign of a short or something is wrong. Do not leave the charger and battery unattended EVER!
Charging - Smart Chargers (ASG Auto-Stop Charger & ASG Mutli-Balance Charger)
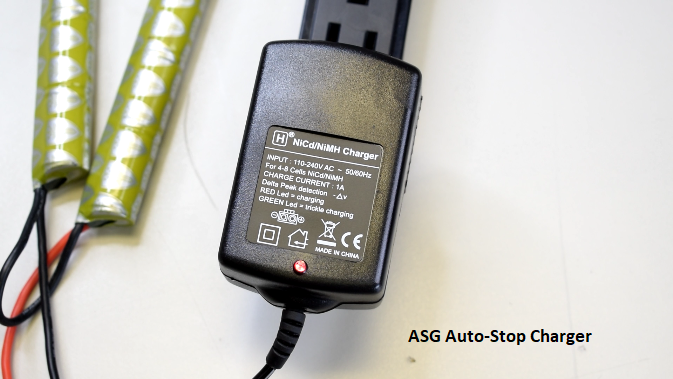
Click to purchase the ASG Auto-Stop Charger
The Auto-Stop Charger is a simple but effective upgrade to something you will be using a lot. With the auto-stop chargers, it's going to cut off on its own, as the name implies. This is great because you don't have to do any guesswork, any math, and it'll always top off your batteries to exactly where it needs to be. Overcharging batteries will destroy them or significantly reduce their life cycle.
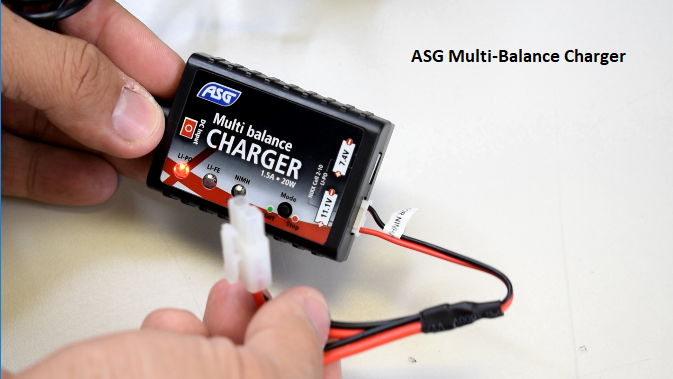
Click to purchase the ASG Multi-Balance Smart Charger
The multi balance charger by ASG is a more all-in-one type charger where you can also do LiPo batteries. I won't go into LiPo batteries in this guide as it is a complicated subject matter and can be more dangerous if you are careless in how you use it. There are performance gains with the LiPo battery that make people consider the risks but I would say that is not a beginner topic so we will skip that for this guide.
Back to the Multi-Balance Charger: This type has multiple settings to charge different types of batteries. While it is more convenient because it can do different types, you have to be more careful about how to use it. You have to use the correct adapter plugs, which are included, and then you have to cycle through the settings so that it will charge properly. Keep in mind when I say battery type I mean NiMH or LiPo. Not the shape (like butterfly).
For the moment we are using the NiMH. So following the instructions, it says to hold the button and it will cycle through the charger settings. Just be sure to follow the instructions carefully like I said. The different flashes mean different things, so if you do this wrong, you could damage your battery, or again, cause a fire. Charging a LiPo battery on NiMH setting is a guaranteed way to cause it to explode and is definitely not covered under any warranty whatsoever as it is user negligence. So for this charger you will see it has only 2 ports for charging LiPos, but it comes with an adapter plug. After connecting that adapter plug to the charger and the the battery, we are going to press the button, and it will start blinking. It will cut off on its own, and then it will be ready to go in no time. Refer to the instructions for more details and be sure to read it thoroughly until you understand.
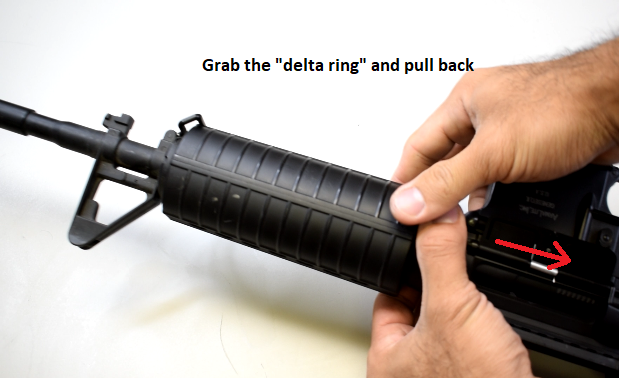
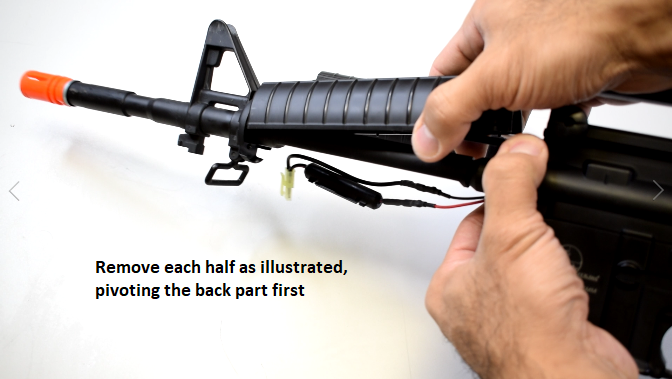
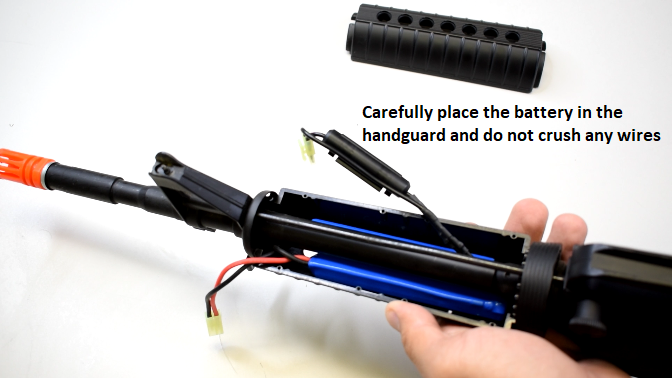
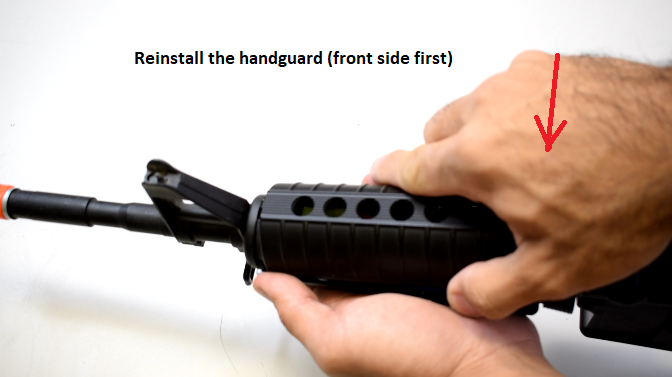
Installing the Battery (For Front-Wired Guns)
With the batteries ready to go, now we are going to install them into the guns. First, I'll start with the ASG M-15. This one is front-wired, so the wiring is in the front of the gun. Typically a front-wired gun will hide the wires inside the handguard or in some cases have an external battery box. This one hides the battery in the handguard. We are going remove the handguard by pulling back on the delta ring. This is springy, so use one hand to hold it back and then you can slip the handguard off one half at a time, which is a clamshell design. Then we will put the battery in the lower handguard and carefully lock the handguard back into place. You have to pay attention to the wiring, as you don't want to pinch the wires. Make sure it's nice and snug and not exposed in any way when you close the handguard, and it should close easily. If it's not, then try again until you do it right.
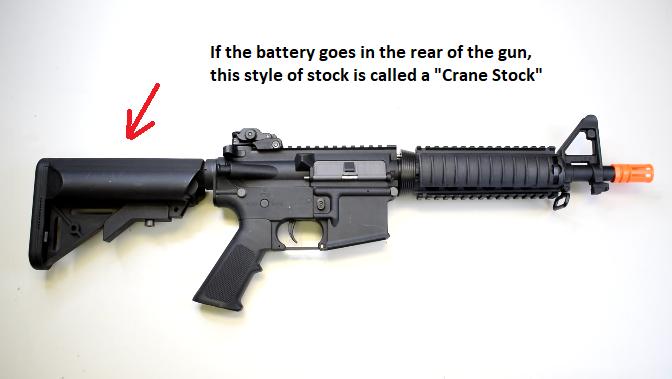
Installing the Battery (For Rear-Wired Guns)
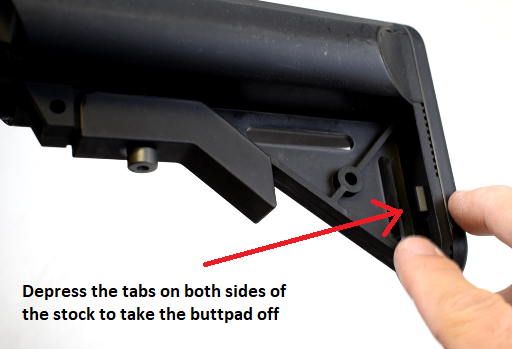
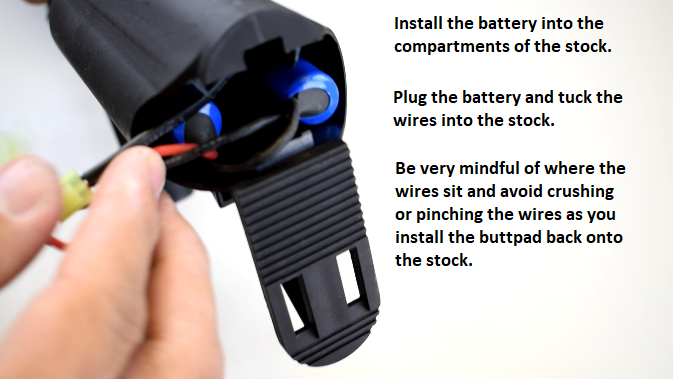
Now with the Lancer Tactical Mk18 and with most M4-style guns, they are going to have this style of stock which will store the battery. We generically call it the crane stock. The crane stock has a removable pad and battery compartment built in. First we are going to remove the pad from the back of the butt stock here. There are two tabs, both identical, one on each side. Use your index finger and your thumb to depress the tabs on both sides simultaneously and then pivot the butt pad off. Once it is off, find the wiring in the back of what is called the buffer tube, and gently pull the plug put of the tube so you can plug in the battery. Now install your battery into the correct compartments in the stock and connect the plug from your gun to the battery plug. Before reinstalling the buttpad, be sure to route the wiring so that it won't be crushed when you put the butt pad back on. Do not attempt to put the buttpad on until you do this correctly or you will damage the wires. When you are putting the buttpad on it should go on as easily and smoothly as it came offThere shouldn't be any issues as far as feeling any wires being crushed. You will know you did it correctly when the stock can slide back and forth without effort. Be careful about pushing the stock all the way to the most collapsed setting as it can crush wires too. Likewise, do not extend the stock in a violent manner -- do it carefully so you don't accidentally rip the wiring inside the stock.

Some guns have a rear-wired setup but feature a different stock such as the Elite Force M4 CFR. The steps and processes will be exactly the same, the only difference is this gun has a hinged butt plate on the stock. This makes it easier to open and there's no chance of you losing the buttpad ever. Again, pay attention to the wires and make sure to not crush them.
Ammo - What Type BBs
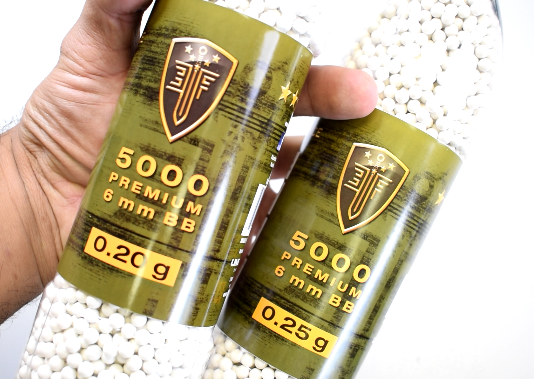
For Airsoft we use 6mm plastic BBs. Do not confuse this with 4.5mm/.177 caliber which is a different breed entirely. The BBs we typically use range from 0.20 grams and up. You will find 0.12 grams which is typically reserved for low quality guns that don't shoot hard. They usually come in bright neon colors but that is not your only clue. Usually you will find them at a big box store which carries low-end airsoft guns. These types of BBs will damage your gun and void your warranty so I don't care how cheap you got them or how long your gun has lasted so far with them, this will guaranteed destroy your gun and cost you more money in the long run. What weight do you want to use? Generally speaking, the light ones like 0.20g travel faster and cost less. The heavier ones give better shot consistency and are less reactive to wind deflection but have a slower flight time out of the same gun. I like heavier ones like 0.28g which will give me less flyers but 0.25g is probably the best all-around weight to start with. With a stock performing gun, you will be looking at 150-200 feet of range and be capable of hitting a torso-sized target with your Hop-Up adjusted properly. 6mm airsoft guns will not be as accurate as a real gun or a pellet gun so a torso-sized target is a reasonable expectation at those given ranges.
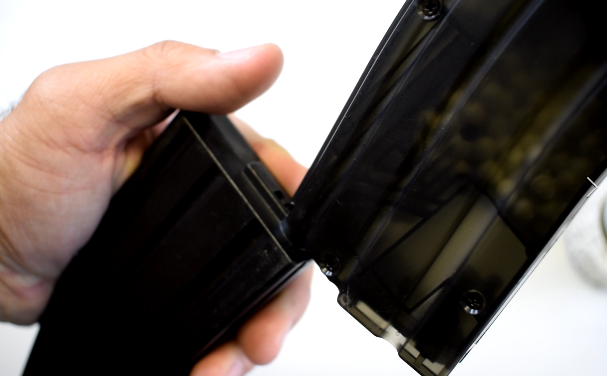
Magazines - High Cap
There are two types of AEG magazines: high-caps and mid/low-caps. The high caps for M4s hold about 300 rounds, and have a wheel at the bottom. The wheel is called the winding wheel. To load, open the trapdoor on the top and pour the BBs into the top until it is full. Close the trap door, and then start winding the wheel on the bottom. It will only go one direction. It will make this distinct ratcheting sound and then when it's done winding it will make a different clicking noise when you attempt to keep winding it. You'll be able to shoot about a third of the magazine off before you have to wind it again. As you wind it, it will pick up BBs from inside and as you run lower and lower, the remaining BBs will rattle around inside the magazine. This noise might be off-putting for a tactical-minded player since noise from your magazines can give away your position which is why some people prefer running mid-capacity (mid-cap) magazines.
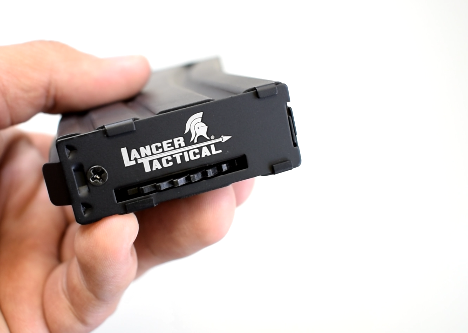
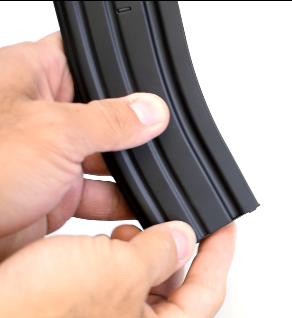
Magazines - Mid Cap
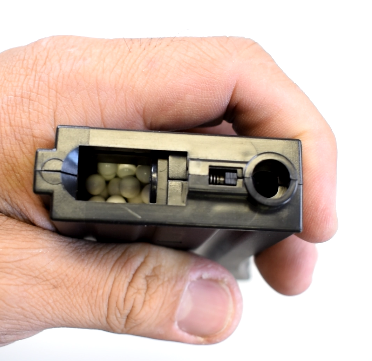
Loading and using a mid capacity magazine is a different process. These do not require winding while being used. They have a simple top and bottom, so there's nothing to look out for. You must use a loading tool, to transfer BBs into the magazine. The loading tool will hold anywhere from 90 or more and they will sometimes come with attachments, which you may or may not use in other guns.The tool will have a trapdoor like a high-cap would. Once it is full, close it and we can begin the process of loading the magazine. For this guide I will be using a 480round capacity speed loader.With your fully loaded tool you will line up the loading portion of the tool to the top of the magazine. Depress the spring-loaded plunger-like button on top, which will transfer four or five BBs at a time. You will release and keep pushing and releasing and loading the 4-5 BBs at a time until it is full. You will know it is full when the magazine will stop taking in more ammo which is preceded by increasing resistance from spring tension.
Adjusting Hop-Up
Our magazines are now ready to go so we can just insert them into the gun and it will be ready to shoot. There is nothing you have to do to load besides inserting the magazine. Sometimes it may not pick up the first round into the chamber so you might have to cycle the gun once or twice before ammo is actually fed into the gun.
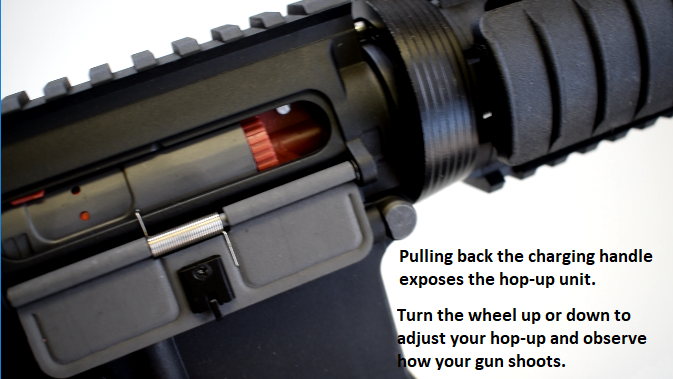
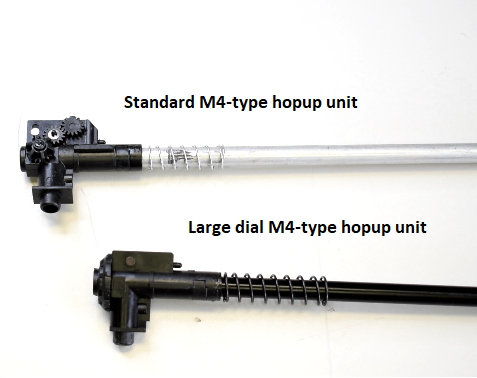
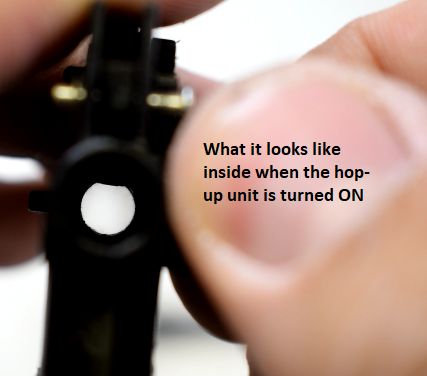
Now on to adjusting the hop up. Pull the charging handle back on your M4 and it will expose the hop up unit/hop up chamber. Hop-up gives backspin to the BB as it is shot out of the gun to compensate for droppage. This allows your high quality airsoft gun to significantly outrange guns that do not have hopup. Whatever weight you select for BBs, you will compensate for the drop by adjusting the hop-up. I have these hop-ups out of the gun just so I can easier demonstrate for you how to adjust them. Two common types will be a large dial or three-wheel system. So this is the dial type where you just turn a big wheel. Here is what it looks like inside the chamber with the hop-up effect more pronounced. The other system is the same, but it just uses a system of dials and cog-type gears to achieve the same mechanical adjustment. You will turn the biggest of the three wheels, and that will introduce more hop up.
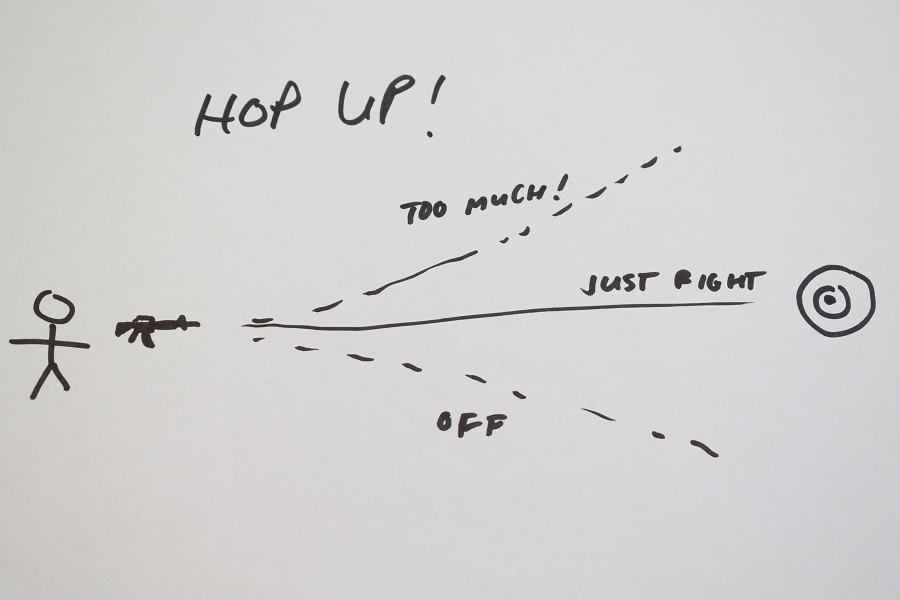
To demonstrate the effects of hop up, I have this crude drawing I whipped up really quickly. So what you are trying to do is achieve the straightest possible flight for your BB. The effectiveness of your adjustment will vary with the type of weight BB you are using. On this drawing, you will want to adjust your hopup to be more or less until you achieve a a flight path which resembles the solid center line on my drawing. With that dialed in you can expect it to fly straight up to the 150 to almost 200 feet before it drops and the hop-up can no longer compensate for drop. If you have your hop-up adjusted too much, it will fly and curve sharply up pretty much immediately and if you have it set too low or off, the BB will drop significantly short of the target. So depending on the weight of the BB you're using, you will shoot and adjust until you find the sweet spot. If you happen to use a different weight BB next time, you will have to adjust it again to match that ammo.
One thing to note is that the for the last 4 BBs that are in the magazine, those last 4 BBs are never picked up the into the gun. This is a design quirk because the follower in the magazine (the part that pushes the BB up) cannot extend into the hopup unit to load those 4 shots. This is just a thing that is part of the design so get used to it. Likewise if you eject the magazine at any time, there will be 4 BBs that fall out. So when your gun is empty and you shoot it and nothing comes out, there is nothing stopping you from cycling the gun. But you will know you are out and upon ejecting the magazine there will be those 4 BBs I mentioned.
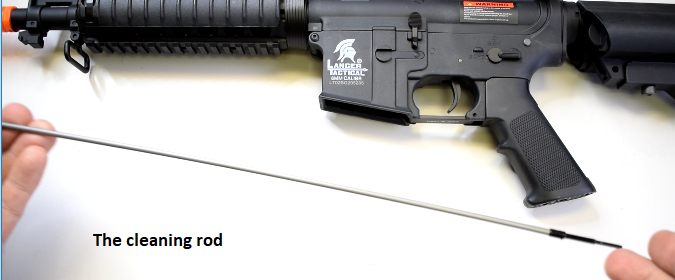
Cleaning/Unjamming Rod
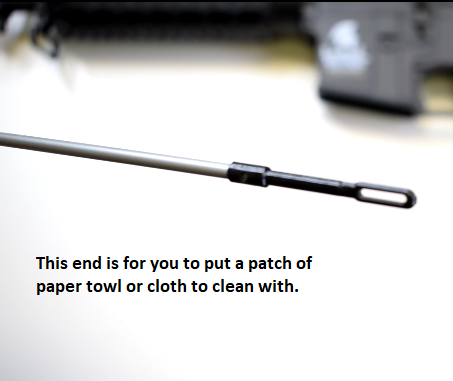
Now here we have a cleaning rod. This will have two parts to it: a loop side and a poking side. The loop side is used for cleaning. You will cut a small square of paper towel or some kind of cloth, around 2x2 inches, and then you will spritz it with silicone oil. Use only 100% silicone oil sold at airsoft and hobby shops. Using anything else will damage your airsoft gun.
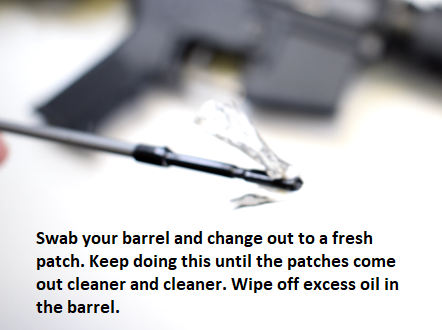
With your cleaning patch wet from oil you will put this rod into your gun and do a couple sweeps there. After every 1-2 sweeps you will throw away the dirty towel and put in another patch and repeat the process. Eventually when the patches come out with less and less gunk on them you will know you are actually cleaning the barrel. Once it comes out clean you will take a dry patch to wipe out any excess oil. Leaving oil in there will be enough to get your barrel dirty again.You'll even want to do this on a new gun, but as far as frequency I would say do this after every two or three games and you'll be fine.
Click to purchase the ASG UltAir Silone Lube Spray
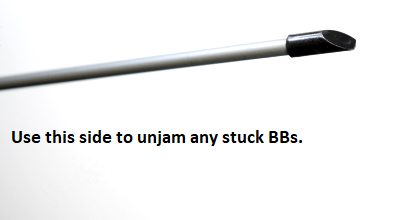
Now for the poking side, you'll use that to unjam the gun. If you have a BB stuck in the chamber, and you can't shoot it out, you can use the rod to poke it out. The sound of a BB jammed in your gun will have a distinct thud to it when you fire. Do not keep pulling the trigger if you have a jam. This can potentially cause more damage. Go straight to clearing your jam first before attempting anything else.
This will conclude the first part of this guide covering using the gun and accessories. Part two will be up shortly and feature all the quirks and things you should and shouldn't do with your AEG to keep it lasting a really long time. See you guys later!
Click to purchase the Lancer Tactical Mk18 Gen2
Click to purchase the Elite Force M4 CFR
Click to purchase the ASG Armalite M-15 Sportline
You can watch the abbreviated video format of this blog here: